Friday, September 30, 2011

Shredded Pork and Pickled Mustard Noodle Soup 榨菜肉絲麵

This is one of my mother's classic noodle soup dishes. It is something you can find on most Chinese casual dining menus and it is great on a winter night. Everything can be pre-made and then you just boil the noodles and toss everything together. 

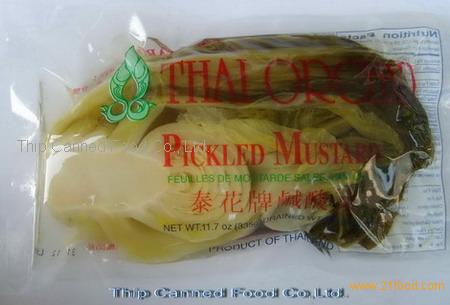
The key ingredient to this dish is the pickled mustard "tuber." Since I always refer to this vegetable with its chinese name, it had a hard time finding a good picture of this online. It should look like this and not this. You can find these at local Asian stores in the preserved vegetable aisle, as these are not refrigerated. They often have several flavors and I usually buy the spicy for some extra kick. 

Shredded Pork and Pickled Mustard Noodle Soup 榨菜肉絲麵

Ingredients
1/4 lb pork tenderloin, cut into thin strips
2 tbsp cooking wine
1 pinch of salt 
1 tbsp corn starch
3 cloves garlic
2 small packages of pickled mustard tuber
Noodles of your choice
2-3 cups of water or chicken broth
* If using water, add some salt and hondashi to flavor the soup
1/2 tsp ground white pepper

Directions

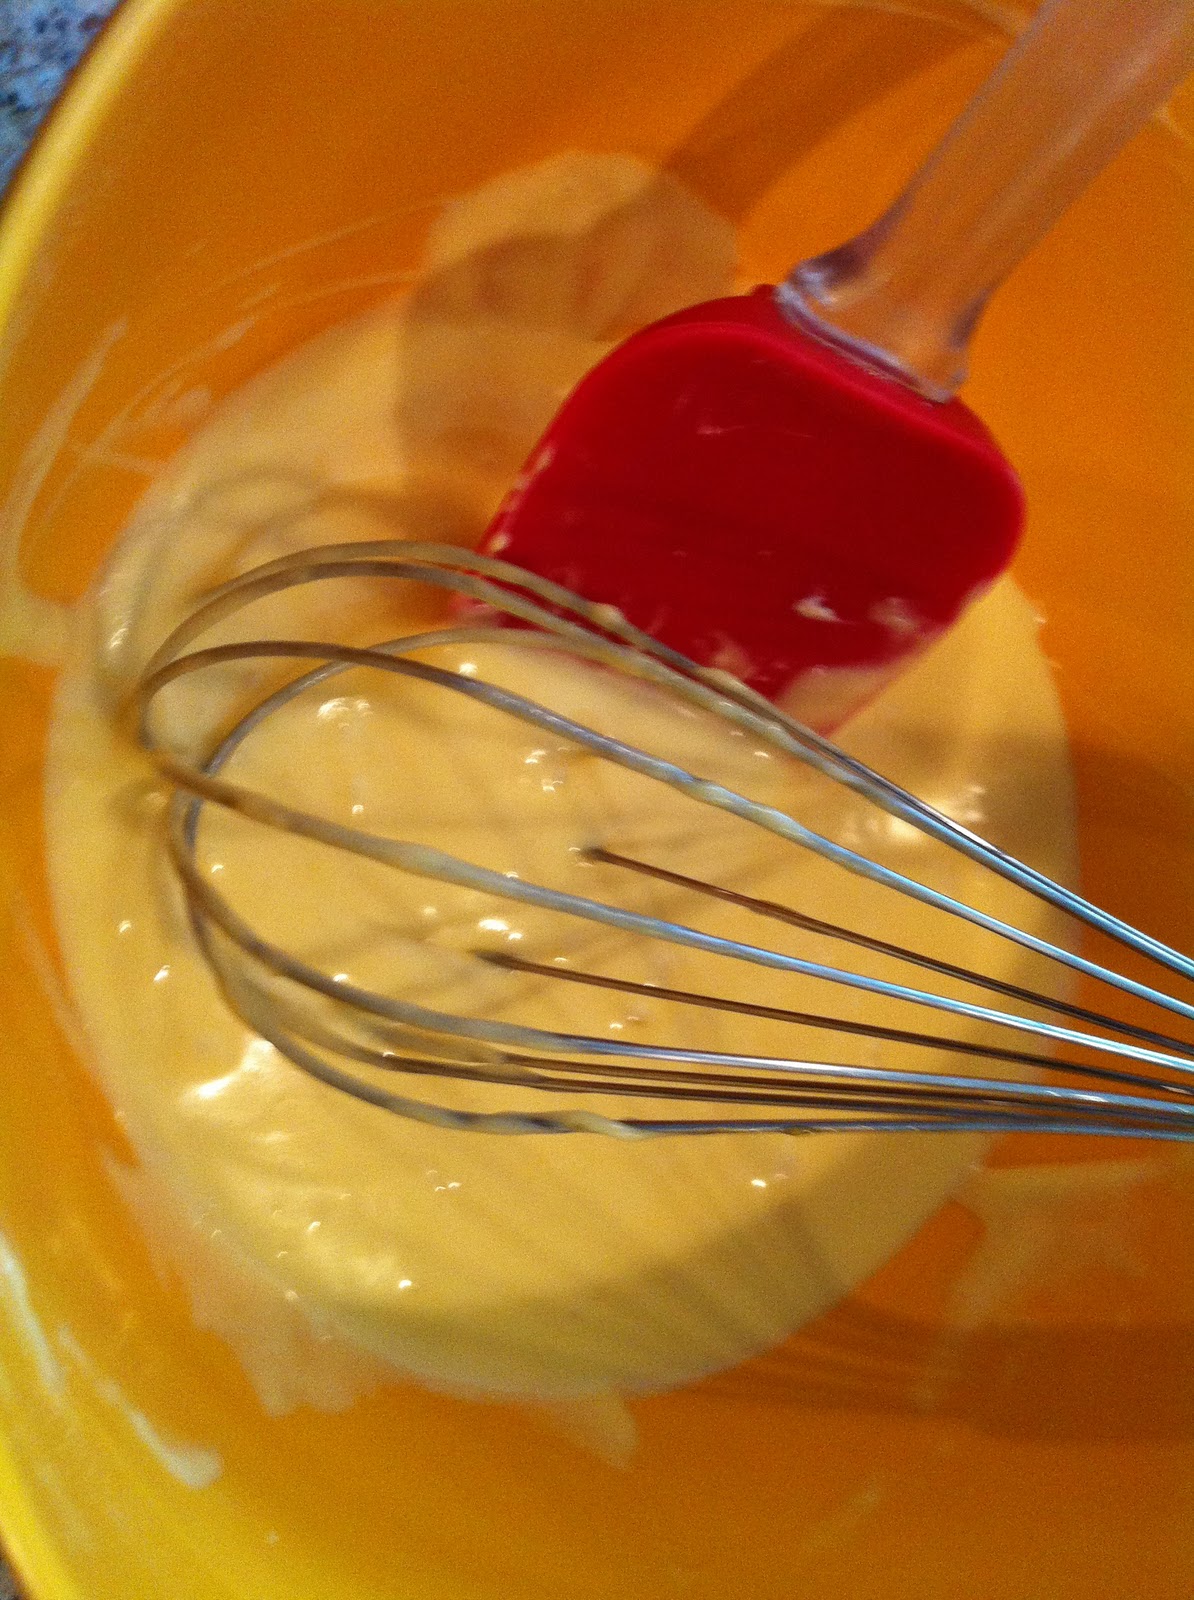
1. Marinate the pork strips with cooking wine, salt, and corn starch. 

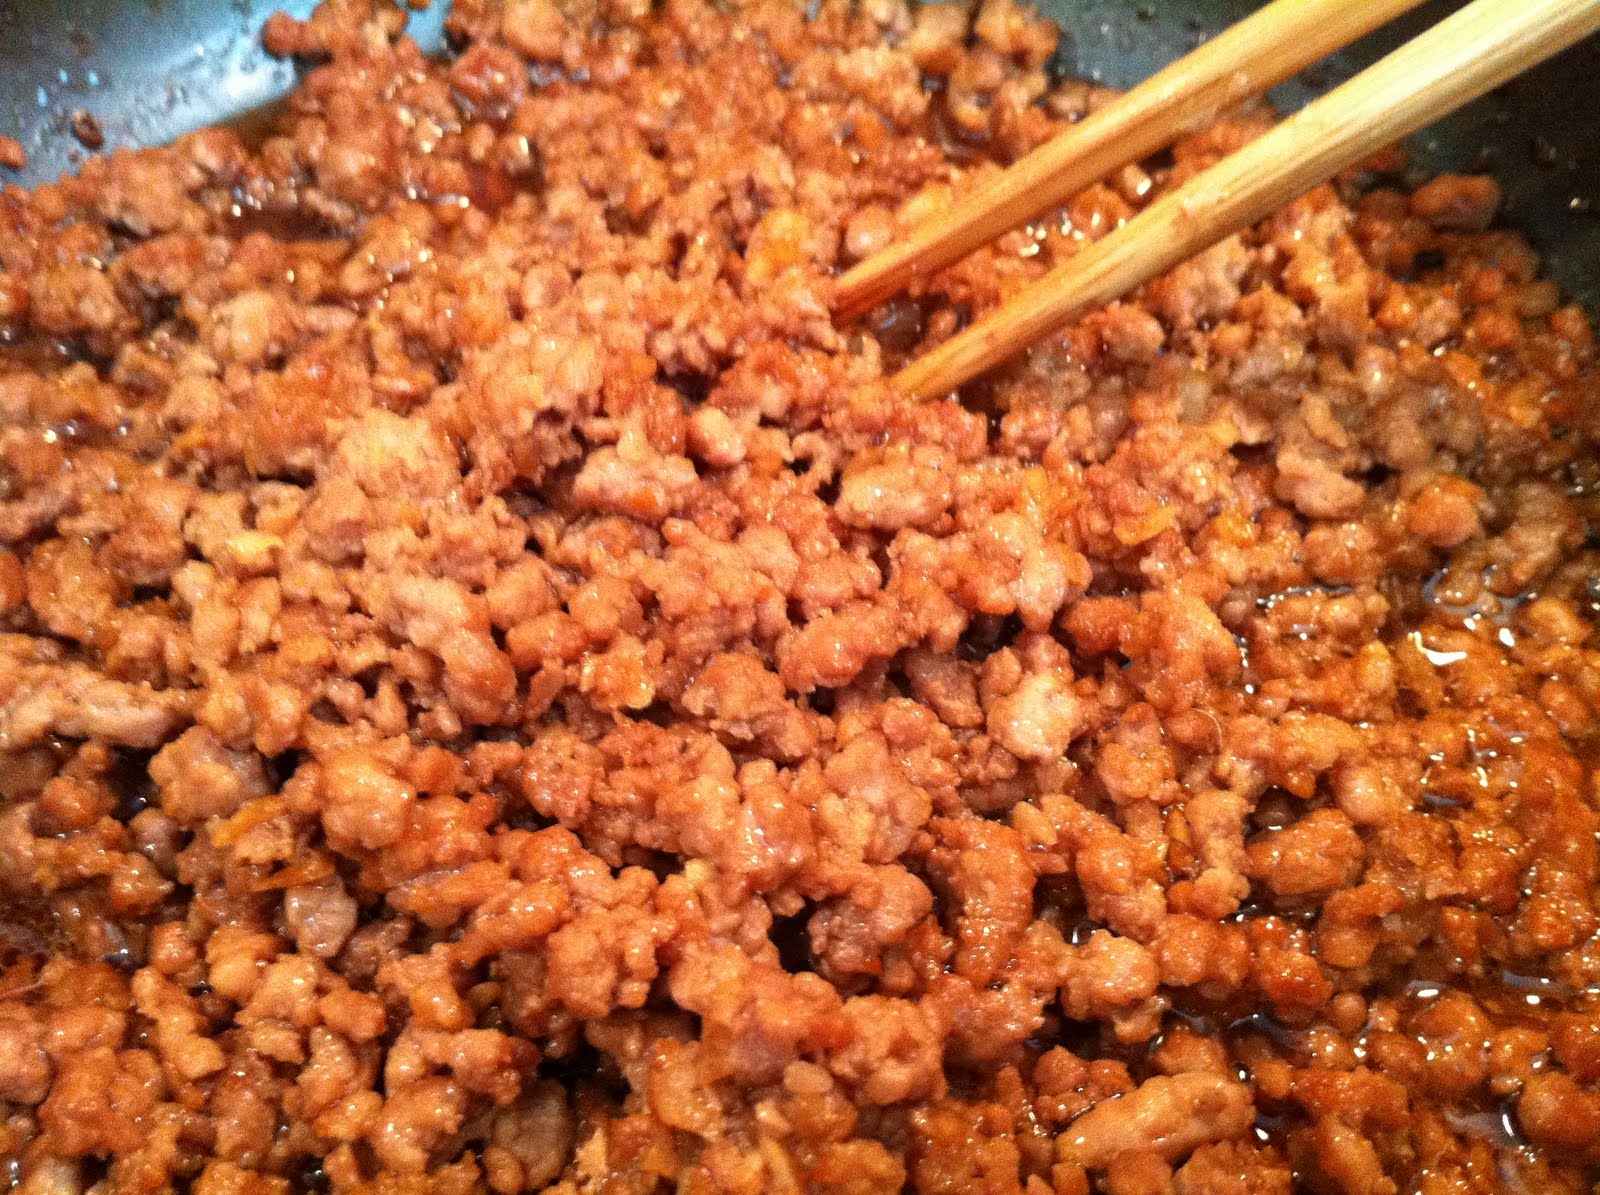
2. Saute garlic until fragrant and cook pork until no longer pink. 

3. Add pickled mustard strips and saute until flavor is even throughout. 

4. Boil noodles.

5. In a stockpot, either use 1/2 proportion of water and 1/2 chicken broth to = 2-3 cups of soup or use all water and add salt and hondashi for some mild flavor in the soup. The amount of soup can vary based on preference and amount of noodles. Stir in ground white pepper.

6. Combine noodles with soup broth and top with pork and pickled mustard.  Serve when hot. 

The topping is easy to prepare and you can refrigerate the topping for up to 1 week. That way, you don't have an excuse when you need to prepare dinner in 15 minutes because you can boil noodles and mix up the soup broth in probably less than 15 minutes. 

Hope you all have a great weekend and enjoy some down time! 

Wednesday, September 28, 2011

Dining In: Durham, NC - Broad Street Cafe

I would consider Durham a great place for casual dining. Dotted throughout the city are great little places that you can pop in and have a great meal with friends over beers. I have no idea what took us so long to head over to Broad Street Cafe, especially since it's so close to Duke, but we are definitely regretting not finding this gem earlier.

Assorted wings: Sweet Chili, Buffalo, and BBQ


The Mediterranean Pizza.


Shrimp and Applewood Bacon with Pesto Pizza. 


The wings were decent, but you don't come here for the wings. Rather, pizzas at Broad Street are wonderful. Chewy, light crust and flavorful toppings served piping hot from their brick oven. They have so many pizza options that you can head there several times without exhausting the list. 

The Sister had the star of the show, which is unfortunately not pictured here because we devoured it too quickly. She had the lamb burger, which was super flavorful, tender, and juicy. If you are in search of a good (yet less gamey) lamb burger in the area, I would suggest you try this out. I will definitely be heading back for that dish and the pizzas. 

Which restaurants would you like to try in the Triangle, but just haven't gotten to yet? 

Hope you have a great (hump) day!  


Monday, September 26, 2011

Paper Wrapped Cake

Ever walk into your neighborhood Asian bakery and catch a whiff of that mildly sweet, eggy sponge cake that's often wrapped in paper like pretty little bouquets? There are only 2 locations (to my knowledge) that make these cakes in the Triangle area, one of which is a far drive and another of which is not my favorite place to shop.

The Husband always asks, "Oh, can we get one of these?" every time we're at one of these 2 locations. The look on his face when he eats these cakes with whipped cream and strawberries just tugs at my heart strings every time. So, I thought, "What's made in a bakery, surely can be made at home. Right?"

The key to these cakes is the light, fluffy texture and slightly sweet, eggy flavor. Anything that involves baking and detailed instructions tends to freak me out. But, what the heck... life's too short to live in fear of flat, soggy sponge cake. So, I gave it my best shot. The original recipe can be found here and while the measurements are not US friendly, they are easily decoded with any measurement converter.

Paper Wrapped Cake
Makes 5 medium or 6 small cakes

Ingredients
5 eggs, whites and yolks separated
50 grams (1.76 oz) butter, melted
60 ml milk
100 grams cake flour
80 grams sugar
1/4 teaspoon vanilla extract
1/4 teaspoon cream of tartar

Directions
1. Preheat oven to 355 F. (I actually had the oven at 180 F for the first 4 minutes of baking until I realized that the original recipe was 180 C. This conversion actually matters!)

2. Combine melted butter with milk. Sift cake flour into butter and milk and mix well. (It might look kind of like a white glob. This is normal.).

3. Whisk egg yolks. Add egg yolks and vanilla extract to cake flour, butter, and milk mixture. Whisk until smooth.


4. Use an electric hand mixer or stand mixer to whisk egg whites for 3 minutes on high. Add cream of tartar and mix 1 minute more. Add sugar and whisk until egg whites form stiff peaks.


5. Fold egg white mixture in thirds into cake flour mixture with a rubber spatula just until all ingredients are combined. Do not stir or mix otherwise you will deflate the batter.

6. Line oven-safe mugs or tall cake cups (like these) with baking paper (not waxed paper). You want the paper to be higher than the edge of the mug in case the batter rises.

7. Pour batter into the lined mugs. Bake for 25-30 minutes. Check centers with a toothpick and if clean, remove from heat.


8. Allow the cakes to cool in the mugs for 1-2 minutes. Then remove and let cool on a wire rack.

Don't let the number of steps fool you. This is not hard to make and in fact it is super easy as long as you follow the directions. While we were waiting the (excruciating) long 25 minutes for the cakes to bake, we kept wondering whether they would be flat, dense cakey messes at the bottom of our mugs. But we were pleasantly surprised and devoured 3 of them before they completely cooled.

Hope you try these and prove to yourself that you (too) can bake delicious Asian pastries at home.

Have a fabulous Monday!

Friday, September 23, 2011

Garlic-Flavored Kale Chips

Oh, the many uses of Kale. There are several varieties, but you can't miss the curly, dark green bunches that often sit untouched at many grocery stores. Sometimes bitter in flavor especially when over-baked and other times just grassy and tender in a vegetable soup. Some people will never love kale and that's just the reality of it. 

When baked, it can be crisp, light, and smoky and robust in flavor. A lot of people have compared kale chips to potato chips and I couldn't agree less. Kale chips are not like potato chips and neither should you expect them to taste like potato chips. However, if you can appreciate kale chips for what they are, you just might like them. 

Garlic-Flavored Kale Chips

Ingredients
1 bunch of kale
2 tbsp olive oil
Salt to taste
5-6 cloves of garlic, minced

Directions
1. Preheat oven 300 degrees.

2. Wash kale and remove green leaves from hard stems. 

3. Chop or rip kale leaves into bite-sized pieces. 

4. Toss with 1 tbsp olive oil and some salt (not too much! you can always add more later).

5. Arrange in one layer on a baking sheet (you can layer on top of parchment or foil for easy cleaning). 

6. Bake for approximately 20 minutes. Flip or shake around half way through (if you remember). 

7. While kale is baking, saute garlic in remaining 1 tbsp of olive oil until fragrant and crisp. Set aside until kale is cooled. 


8. Once kale is cooled, toss with garlic and more salt if necessary. Serve and enjoy! 


For all of the super nutrients in kale, you might as well make an occasional batch and crunch away if you can't stomach it any other way. The Husband even ate it, which I guess says something! 

Hope everyone has a restful weekend! 

Thursday, September 22, 2011

Acorn Squash and Apple Chicken Sausage Bulgar

Life has been quite full lately. Ever have those periods of time when you feel like everything that can go wrong, goes wrong? In the midst of the chaos, we haven't had too much time or energy to cook. So I'm all about simple recipes that you can put together with minimal prep and clean up time. 

I am loving that Fall is here. With fall comes all the winter veggies and spices like cinnamon and nutmeg.  Acorn squash is one of those vegetables that I discovered during graduate school when we had little funds and no time. Also seen here

Microwaved Acorn Squash

Directions
1. Simply cut the acorn squash across its waist and place facedown on a shallow salad bowl. 

2. Pour 1/4 cup of water around the squash. 

3. Microwave for 8-11 minutes (depending on size) and you get sweet and tender squash to stuff (with anything!) or to eat with a bit of butter and some sprinkled cinnamon. 

Every time I make bulgar, The Husband says, "I like bulgar!" It is one of those grains that is super easy to cook and prep. 

Classic Bulgar

Ingredients
1 tbsp olive oil
1 cup bulgar
1 3/4 cup water/stock
Salt and pepper to taste

Directions
1. Heat olive oil on medium heat and pour in bulgar. Stir to coat all bulgar with olive oil.

2. Pour water/stock into the bulgar and turn heat to the lowest setting. Cover and cook for 10 minutes.

3. Turn off heat and let sit covered for 15 minutes. 

4. Fluff bulgar with a fork and add salt and pepper to taste. 

* You can toss in any combination of veggies, meats, or spices to flavor up the bulgar. Similar to other grains such as quinoa. 


Apologies for the lack of posting. Thanks for reading and being a great source of motivation for me to do something purely for enjoyment and pleasure. 

Have a great Thursday. :) 


Wednesday, September 7, 2011

Current Food Musings

Change of seasons. Change of wardrobe. Change of recipes. With the approach of Fall, I am thinking about things that I'd like to make to match the changing weather and temperature. Comfort foods are on the top of the list as is experimenting with more Asian recipes.

Top 3 cookbooks right now include this Lone Star Legacy book that we stole from The Mother-in-Law. It has good ole' southern food recipes as well as a whole section on Mexican food. Current craving is for making pickled okra.
You've seen this one before here. I drool every time I see the Orange Beef recipe. 
This was the first gift The Husband ever gave me before we started dating. There began our shared love of eating and all things food. I love the chewy shrimp or squid balls that you find on the streets of Japan and Taiwan. 
What types of foods are you craving right now?

Monday, September 5, 2011

Lazy Labor Day

Aside from a few moments of sunshine, Labor Day 2011 has been overcast with a hazy gloom. These types of days make me want to eat comfort food all day long and stay under the covers. BLT sandwiches are just one of those foods that you can whip together in a few moments and crunch away at in front of the TV.  

The Sister informed me that you can get bacon quite crispy in the microwave. Just place strips on paper towels and zap in 2 minute increments about 3 times (depending on the amount). This produces a super crisp bacon and minimal oil since it has been absorbed by the paper towels. 
BLT + E = BLT with Fried Egg. 


BLTs should always be made with a fried egg (sorry to all the purists out there). Hope everyone has had a relaxing Labor Day! 

Friday, September 2, 2011

Hot and Sour Noodles 酸辣麵

Asian noodles have a special place in my heart. Be it flat noodles with creamy sauce or thin rice noodles cooked with shiitake mushrooms and veggies. This recipe was recently shared with me by my mother and to top it all off we made homemade asian noodles, which were super al dente.

These noodles are what I would call a toss-it-all-together kind of noodle dish such as cold noodles with peanut sauce, dan dan mein, or ja jiang mein. Essentially these noodles are comprised of 3 components: al dente noodles, toppings, and a sauce. Once the toppings and sauce are placed on the noodles, you simply stir stir stir and voila delicious noodles in a jiffy.

Hot and Sour Noodles

Ingredients
Homemade noodles
250 grams of bread flour
250 grams of all purpose flour
230 grams of water
*Mix ingredients by hand or in stand mixer until a dough ball forms and gluten is activated (translation: there is a bounce back in the dough = chewy noodles). Let dough ball rest covered for 15 minutes. Flatten and cut, see this for details.

Toppings
1/2 lb ground pork
2 tbsp garlic or more
1 tbsp soy sauce
1/2 cucumber, cored, peeled and julienned
2-3 tsp sugar or 3 small pieces of rock sugar

Noodle Sauce
2 teaspoon soy sauce
1 1/2 teaspoon chili oil
2 teaspoon red wine vinegar
1 1/2 sesame oil
1 tbsp cilantro

Directions
1. Saute garlic until fragrant, but do not burn. Add ground pork and saute.

2. Add soy sauce and rock sugar. If sauce is too salty, add some water. Cook ground pork completely. Set aside.


3. Boil salted water and cook noodles to al dente texture.

4. In a separate sauce pan, add all noodle sauce ingredients and a few tablespoons of previously prepared ground pork. If necessary, add salt and sugar to taste. Add remaining pork for desired meat-to-noodle ratio.

5. Add cooked noodles into the noodle sauce ingredients and toss with cucumbers. Serve with cilantro and additional minced garlic for garnishes.


This is one incredibly satisfying and delicious noodle dish that is easily prepared in advance for any meal. Of course you don't need to make homemade noodles, but I definitely have a bias towards freshly made noodles for these toss-it-all-together noodle dishes. 

Have a great weekend everyone!