Showing posts with label vegetables. Show all posts

Tuesday, October 2, 2012

Dining In: Durham, NC - Scratch Bakery Pizza Night


Long time no blog! However, we have a good excuse. We are eagerly awaiting baby spoonraider and life has been very hectic. I have to admit that this post should have gone up last fall since that's probably the last time we went to Scratch for Pizza Night, but I figured I'd still share. 

Scratch Bakery is an adorable coffee shop/bakery/cafe nestled in a side street of downtown Durham. We went to their Pizza Night with some friends and it was BYOB. Perfect! The beet and greens salad was quite flavorful and so refreshing. The pizza had a doughy crust and yummy toppings. The atmosphere is fun and casual. Perfect for those chill fall nights when you just want to eat a no-frills, all comfort meal. 

Hope you have a great week! 

Monday, July 2, 2012

Chocolate Chip Zucchini Bread


Our neighbors have a thriving garden with tomatoes and zucchinis, which they graciously share with us once various items ripen. We were lucky to receive 2 zucchinis from them a few days ago, which prompted me to try this recipe. (I thought there was vanilla in the recipe, hence its inclusion in the picture, but there wasn't!) 

This recipe was tweeted by the Food Network and it was only until later did I realize it was Paula Deen recipe. This often means two things: too much sugar and too much fat. However, since this recipe did not have butter (her usual poison), I decided to give it a try. (I included the parchment paper lining suggestion because both of my loafs got stuck on the bottom despite using non-stick spray.)

When I attempt new baking recipes, I usually try to follow it exactly to see if it is worth making and then proceed to make substitutions for health reasons for future attempts. I will definitely be cutting the sugar and making some substitutions for the oil in the future with this recipe. However, I must say that this recipe is quite good. The result was moist and tender bread that conveniently hid the fact that it was vegetable based. The Husband made 2 slices disappear within minutes, so I guess he liked it too! 

* If you read the 842 reviews, you'll find many suggestions for substitutions for sugar and oil. 

Ingredients
3 1/4 cups all-purpose flour
1 1/2 teaspoons salt
1 teaspoon ground nutmeg
2 teaspoons baking soda
1 teaspoon ground cinnamon
3 cups sugar
1 cup vegetable oil
4 eggs, beaten
1/3 cup water
2 cups grated zucchini
1 teaspoon lemon juice
1 cup chopped walnuts or pecans or chocolate chips 

Directions
1. Preheat oven to 350 degrees F. Prep 2 standard loaf pans, sprayed with nonstick spray, and line bottom of pan with parchment paper.

2. In a large bowl, combine flour, salt, nutmeg, baking soda, cinnamon and sugar. In a separate bowl, combine oil, eggs, water, zucchini and lemon juice. 

3. Mix wet ingredients into dry, but don't over mix. Add nuts/chocolate chips and fold in. 

4. Bake for 1 hour or until a toothpick/skewer comes out clean. Alternately, bake in 5 mini loaf pans for about 45 minutes.

5. Remove from oven and allow to cool in pan for 20 minutes. Then remove from pan and cool completely. 

Hope you have a great Monday! 


Tuesday, January 17, 2012

Green Smoothies 2012

Happy New Year everyone! There is something that I've been meaning to share, but haven't yet had time to do. In November 2011, The Sister shared with me the concept of green smoothies and sent me several books including The Green Smoothie Revolution and Green for Life

We obviously all know about the health benefits of eating leafy green vegetables as part of a healthy diet. However, how many of us can actually achieve this efficiently and deliciously? I've had many a night when I've chosen starch or carb over a veggie-filled dinner. Well Green Smoothies are amazingly easy and simple and can help you get more vegetables in your life. 

The concept is water + leafy green vegetables + fruit. That is it. Try to use the freshest and least pesticide-filled ingredients because you are drinking these ingredients uncooked. 

Here are a few rules I've adhered to in the past few months: 
1. Rotate your greens - weekly or daily to prevent build up of alkaloids in your body. 
2. Bananas - make anything green taste infinitely better.
3. Keep it simple - no more than 2-3 leafy greens in each smoothie. 
4. Start slow - give your body and taste buds time to adjust by starting with more fruits than greens.
5. Start with 12 oz a day - your body will likely crave more as you go on. (The eventual goal is 32 oz a day if possible, but remember start slow). 


collard greens + mustard greens + water


blend


kiwi + blueberries + strawberries
blend again


refreshing + tasty

You'll be amazed how tolerable and quite tasty these green smoothies can be when you keep it simple with 1, 2, or 3 kinds of leafy greens (not things like broccoli, cauliflower, beans, etc). Combining the greens with a variety of fruits results in a delicious drink that can be supplemented to meals or substituted for a light breakfast or snack. The book recommends drinking the smoothie 45 minutes before or after you've had food to maximize absorption of nutrients. I just do what feels right. 

My New Year's resolution is to drink a smoothie 5-7 days out of the week for the entire year. I'm excited for a year of more energy, better skin, and improved health! 

Hope you'll join me and let me know what your recipes include! 

Below are some of my most common combinations: 
bokchoy + kiwi + banana + water
baby spinach + strawberries + blueberries + banana + water
collard greens + kiwi + strawberries + blueberries + water
kale + banana + OJ + strawberries 

Have a healthful Tuesday!

Friday, September 30, 2011

Shredded Pork and Pickled Mustard Noodle Soup 榨菜肉絲麵

This is one of my mother's classic noodle soup dishes. It is something you can find on most Chinese casual dining menus and it is great on a winter night. Everything can be pre-made and then you just boil the noodles and toss everything together. 

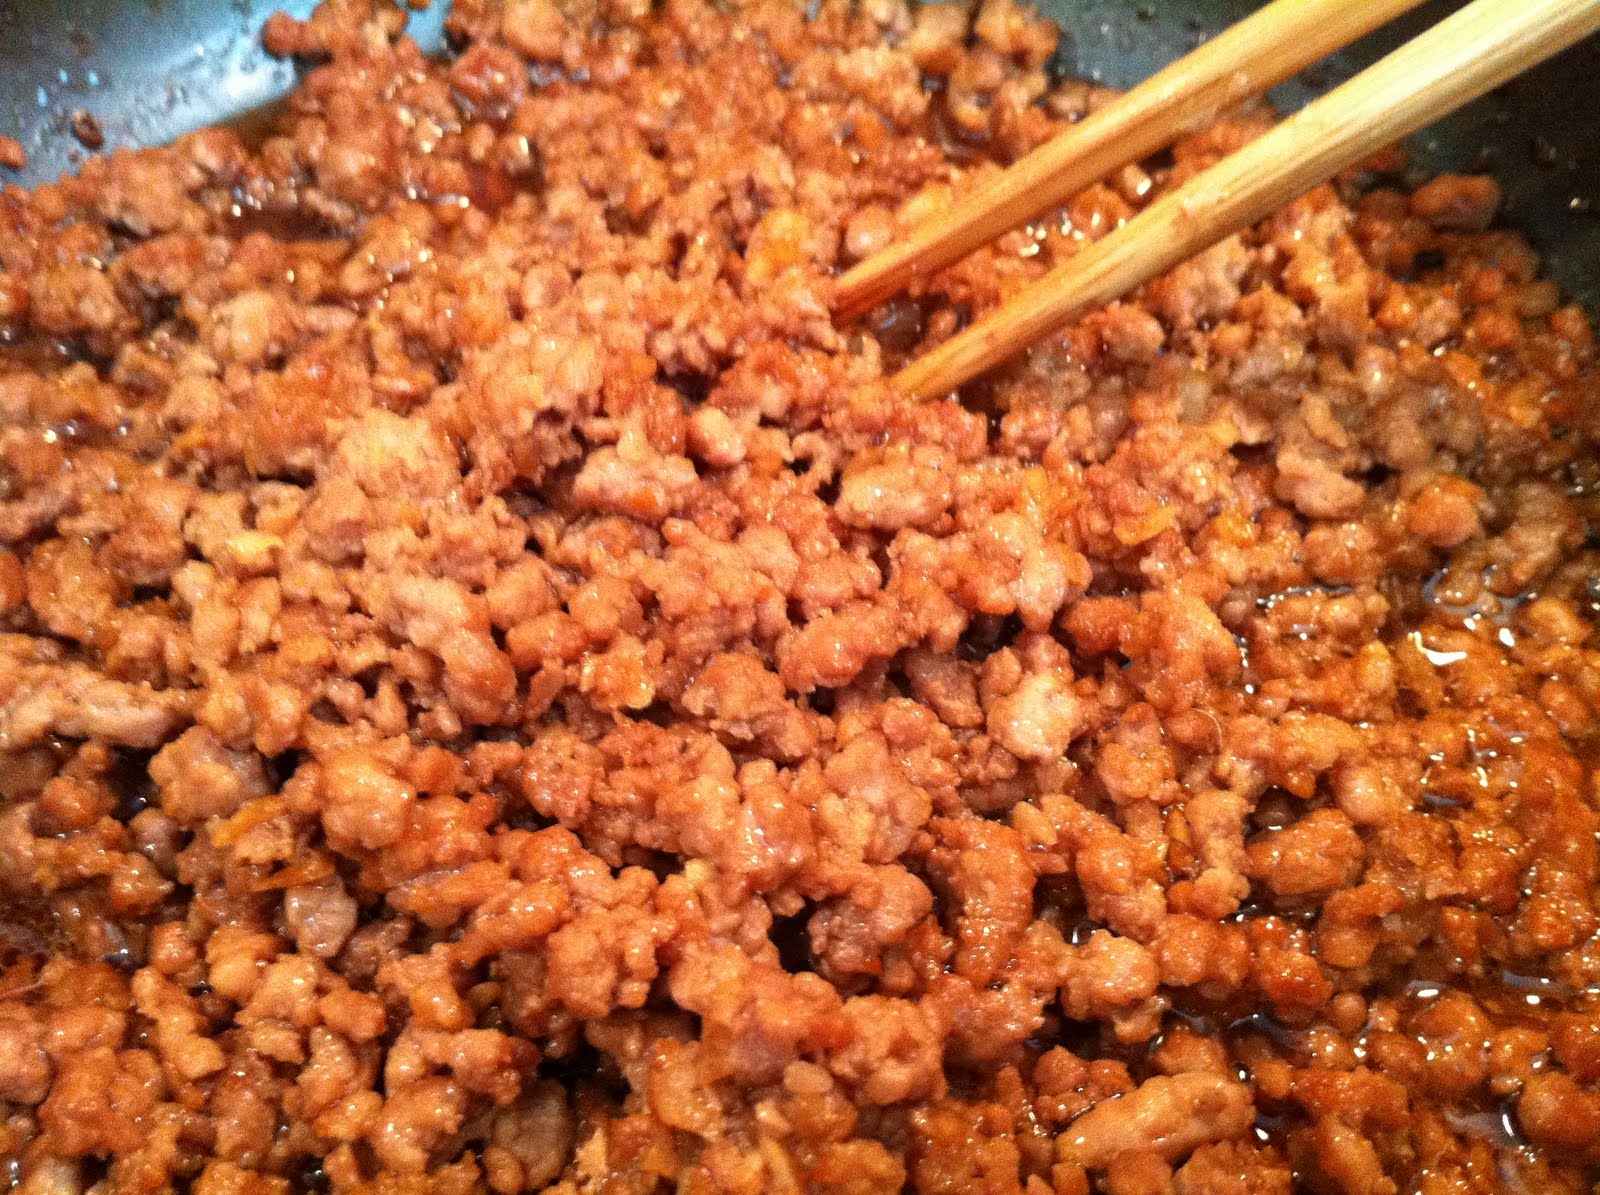
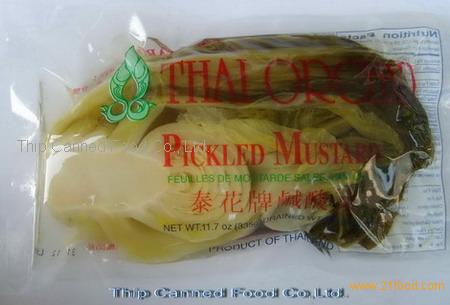
The key ingredient to this dish is the pickled mustard "tuber." Since I always refer to this vegetable with its chinese name, it had a hard time finding a good picture of this online. It should look like this and not this. You can find these at local Asian stores in the preserved vegetable aisle, as these are not refrigerated. They often have several flavors and I usually buy the spicy for some extra kick. 

Shredded Pork and Pickled Mustard Noodle Soup 榨菜肉絲麵

Ingredients
1/4 lb pork tenderloin, cut into thin strips
2 tbsp cooking wine
1 pinch of salt 
1 tbsp corn starch
3 cloves garlic
2 small packages of pickled mustard tuber
Noodles of your choice
2-3 cups of water or chicken broth
* If using water, add some salt and hondashi to flavor the soup
1/2 tsp ground white pepper

Directions

1. Marinate the pork strips with cooking wine, salt, and corn starch. 

2. Saute garlic until fragrant and cook pork until no longer pink. 

3. Add pickled mustard strips and saute until flavor is even throughout. 

4. Boil noodles.

5. In a stockpot, either use 1/2 proportion of water and 1/2 chicken broth to = 2-3 cups of soup or use all water and add salt and hondashi for some mild flavor in the soup. The amount of soup can vary based on preference and amount of noodles. Stir in ground white pepper.

6. Combine noodles with soup broth and top with pork and pickled mustard.  Serve when hot. 

The topping is easy to prepare and you can refrigerate the topping for up to 1 week. That way, you don't have an excuse when you need to prepare dinner in 15 minutes because you can boil noodles and mix up the soup broth in probably less than 15 minutes. 

Hope you all have a great weekend and enjoy some down time! 

Wednesday, September 28, 2011

Dining In: Durham, NC - Broad Street Cafe

I would consider Durham a great place for casual dining. Dotted throughout the city are great little places that you can pop in and have a great meal with friends over beers. I have no idea what took us so long to head over to Broad Street Cafe, especially since it's so close to Duke, but we are definitely regretting not finding this gem earlier.

Assorted wings: Sweet Chili, Buffalo, and BBQ


The Mediterranean Pizza.


Shrimp and Applewood Bacon with Pesto Pizza. 


The wings were decent, but you don't come here for the wings. Rather, pizzas at Broad Street are wonderful. Chewy, light crust and flavorful toppings served piping hot from their brick oven. They have so many pizza options that you can head there several times without exhausting the list. 

The Sister had the star of the show, which is unfortunately not pictured here because we devoured it too quickly. She had the lamb burger, which was super flavorful, tender, and juicy. If you are in search of a good (yet less gamey) lamb burger in the area, I would suggest you try this out. I will definitely be heading back for that dish and the pizzas. 

Which restaurants would you like to try in the Triangle, but just haven't gotten to yet? 

Hope you have a great (hump) day!  


Friday, September 23, 2011

Garlic-Flavored Kale Chips

Oh, the many uses of Kale. There are several varieties, but you can't miss the curly, dark green bunches that often sit untouched at many grocery stores. Sometimes bitter in flavor especially when over-baked and other times just grassy and tender in a vegetable soup. Some people will never love kale and that's just the reality of it. 

When baked, it can be crisp, light, and smoky and robust in flavor. A lot of people have compared kale chips to potato chips and I couldn't agree less. Kale chips are not like potato chips and neither should you expect them to taste like potato chips. However, if you can appreciate kale chips for what they are, you just might like them. 

Garlic-Flavored Kale Chips

Ingredients
1 bunch of kale
2 tbsp olive oil
Salt to taste
5-6 cloves of garlic, minced

Directions
1. Preheat oven 300 degrees.

2. Wash kale and remove green leaves from hard stems. 

3. Chop or rip kale leaves into bite-sized pieces. 

4. Toss with 1 tbsp olive oil and some salt (not too much! you can always add more later).

5. Arrange in one layer on a baking sheet (you can layer on top of parchment or foil for easy cleaning). 

6. Bake for approximately 20 minutes. Flip or shake around half way through (if you remember). 

7. While kale is baking, saute garlic in remaining 1 tbsp of olive oil until fragrant and crisp. Set aside until kale is cooled. 


8. Once kale is cooled, toss with garlic and more salt if necessary. Serve and enjoy! 


For all of the super nutrients in kale, you might as well make an occasional batch and crunch away if you can't stomach it any other way. The Husband even ate it, which I guess says something! 

Hope everyone has a restful weekend! 

Thursday, September 22, 2011

Acorn Squash and Apple Chicken Sausage Bulgar

Life has been quite full lately. Ever have those periods of time when you feel like everything that can go wrong, goes wrong? In the midst of the chaos, we haven't had too much time or energy to cook. So I'm all about simple recipes that you can put together with minimal prep and clean up time. 

I am loving that Fall is here. With fall comes all the winter veggies and spices like cinnamon and nutmeg.  Acorn squash is one of those vegetables that I discovered during graduate school when we had little funds and no time. Also seen here

Microwaved Acorn Squash

Directions
1. Simply cut the acorn squash across its waist and place facedown on a shallow salad bowl. 

2. Pour 1/4 cup of water around the squash. 

3. Microwave for 8-11 minutes (depending on size) and you get sweet and tender squash to stuff (with anything!) or to eat with a bit of butter and some sprinkled cinnamon. 

Every time I make bulgar, The Husband says, "I like bulgar!" It is one of those grains that is super easy to cook and prep. 

Classic Bulgar

Ingredients
1 tbsp olive oil
1 cup bulgar
1 3/4 cup water/stock
Salt and pepper to taste

Directions
1. Heat olive oil on medium heat and pour in bulgar. Stir to coat all bulgar with olive oil.

2. Pour water/stock into the bulgar and turn heat to the lowest setting. Cover and cook for 10 minutes.

3. Turn off heat and let sit covered for 15 minutes. 

4. Fluff bulgar with a fork and add salt and pepper to taste. 

* You can toss in any combination of veggies, meats, or spices to flavor up the bulgar. Similar to other grains such as quinoa. 


Apologies for the lack of posting. Thanks for reading and being a great source of motivation for me to do something purely for enjoyment and pleasure. 

Have a great Thursday. :) 


Friday, September 2, 2011

Hot and Sour Noodles 酸辣麵

Asian noodles have a special place in my heart. Be it flat noodles with creamy sauce or thin rice noodles cooked with shiitake mushrooms and veggies. This recipe was recently shared with me by my mother and to top it all off we made homemade asian noodles, which were super al dente.

These noodles are what I would call a toss-it-all-together kind of noodle dish such as cold noodles with peanut sauce, dan dan mein, or ja jiang mein. Essentially these noodles are comprised of 3 components: al dente noodles, toppings, and a sauce. Once the toppings and sauce are placed on the noodles, you simply stir stir stir and voila delicious noodles in a jiffy.

Hot and Sour Noodles

Ingredients
Homemade noodles
250 grams of bread flour
250 grams of all purpose flour
230 grams of water
*Mix ingredients by hand or in stand mixer until a dough ball forms and gluten is activated (translation: there is a bounce back in the dough = chewy noodles). Let dough ball rest covered for 15 minutes. Flatten and cut, see this for details.

Toppings
1/2 lb ground pork
2 tbsp garlic or more
1 tbsp soy sauce
1/2 cucumber, cored, peeled and julienned
2-3 tsp sugar or 3 small pieces of rock sugar

Noodle Sauce
2 teaspoon soy sauce
1 1/2 teaspoon chili oil
2 teaspoon red wine vinegar
1 1/2 sesame oil
1 tbsp cilantro

Directions
1. Saute garlic until fragrant, but do not burn. Add ground pork and saute.

2. Add soy sauce and rock sugar. If sauce is too salty, add some water. Cook ground pork completely. Set aside.


3. Boil salted water and cook noodles to al dente texture.

4. In a separate sauce pan, add all noodle sauce ingredients and a few tablespoons of previously prepared ground pork. If necessary, add salt and sugar to taste. Add remaining pork for desired meat-to-noodle ratio.

5. Add cooked noodles into the noodle sauce ingredients and toss with cucumbers. Serve with cilantro and additional minced garlic for garnishes.


This is one incredibly satisfying and delicious noodle dish that is easily prepared in advance for any meal. Of course you don't need to make homemade noodles, but I definitely have a bias towards freshly made noodles for these toss-it-all-together noodle dishes. 

Have a great weekend everyone!

Wednesday, August 31, 2011

Summer Wheatberry Salad

I'm always on the search for wholesome grains that taste less wholesome than they look. When I say less wholesome, I mean grains that don't taste like cardboard and hamster pellets. Wheatberry was something I tried during a recent co-op grocery lunch with a friend and the chewy, popping grains were quite good as a cool summer salad. 


This recipe was rated highly on the Food Network website so I decided to give it a shot. 

Summer Wheatberry Salad

Ingredients
1 1/2 cups hard wheat berries
3/4 cup chopped walnuts
2 stalks celery, finely chopped
1/2 cup tart dried cherries, chopped
1 scallion, white and green parts, chopped
1/2 cup finely chopped parsley leaves
3 tablespoons olive oil
2 tablespoons lemon juice
Salt and freshly ground black pepper

Directions
1. In a large pot combine the wheat berries and enough water to come 2 inches over the wheat berries. Bring to a boil and cook uncovered for 1 hour, or until tender. Drain and let cool. 

2. Toast the walnuts in a medium dry skillet over medium-high heat until fragrant, 2 to 3 minutes.

3. In a large bowl, combine the wheat berries, walnuts, celery, dried cherries, scallions, parsley, olive oil and lemon juice. Season, to taste, with salt and pepper.

Wheatberry Salad with a side of marinated beets (marinate with water/beet juice, balsamic vinegar, and sugar). Super easy to prepare and stores well as a side item for workday lunches. Sometimes eating healthy simply allows you to indulge a little bit for dessert. Perhaps more on that in another post. ;) 

Have a great Wednesday! 

Monday, August 29, 2011

Soupe Poireaux Pommes de Terre

Since Hurricane Irene decided to wreck the East Coast, we stayed in all day Saturday to hide from the rain and strong winds. Luckily, we were spared the severe wreckage that some other states received. An earthquake and hurricane in one week is just too much weather drama for my temperate-inclined nature.

While hiding out at home in the dreary weather, I remembered that we had some leeks and potatoes sitting around waiting to be next week's trash. Jacque Pepin made this recipe on his "Fast Food My Way" show on PBS, which is where the inspiration came from. The specific recipe came from here.

Soupe Poireaux Pommes de Terre
Potato and Leek Soup

Ingredients
4 potatoes, peeled and cut into small pieces
2 leeks, sliced in quarters length-wise to clean and then chopped
2 cloves of garlic, minced
6 cups of chicken or vegetable stock
2 tablespoons of sour cream (optional)
Salt and pepper
2 strips of bacon (optional)
5-7 mushrooms (optional)


Directions
1. (Optional) Slice your bacon into 1 inch pieces and cook over medium heat until crispy. Remove bacon and reserve on side. When cooled, crush to crumbles. Leave the bacon fat in the pan – this will give your soup a deeper level of flavor.

2. Saute leeks and garlic in the rendered bacon fat, if you used bacon, or some olive oil until soft. (Optional: Reserve some leeks for garnish).

3. Add potatoes to the sauteed leeks and pour in the chicken or vegetable stock.

4. Bring to a boil and then lower heat and simmer for 20 minutes, or until potatoes are falling apart. If preferred, reserve some pieces of potato if you want some texture and return to soup after blending.

5. Optional: Add your two tablespoons of sour cream if you prefer a thicker, creamier soup (you can choose to blend first, see what the soup looks like and then add the sour cream and blend again). Add some salt, if necessary, and pepper.

6. Using an emulsion blender or traditional blender, puree the soup. Add in mushrooms and simmer until mushrooms are cooked.


7. Serve in bowls and top with some crumbled bacon and sauteed leeks. We added some thin parmesan shavings (just because).


This will now be added to my arsenal of warming winter soups. Super creamy (with no cream or sour cream added) and flavored with crisp bacon garnish that rounds out the indulgent and comforting flavors of this soup.

Hope your Monday is focused and productive!

Friday, August 26, 2011

Dining In: Chapel Hill, NC - Medi Deli

Mediterranean Deli is hands down my favorite Mediterranean restaurant in the Triangle area and by the looks of Yelp reviews a lot of people feel the same way. I always get the same thing because it is so freaking satisfying. 

Gyro Platter with Scallion Hummus and Greek Salad. (The Husband got to the plate before I could take a picture).  


Lamb Fatayer.


Lahm Bi Ajeen.


All of the spices, lamb, and veggies are super flavorful. They also have a handy condiment bar that offers tzatziki, feta cheese, olives and more. I find that I start to crave Medi Deli when I just want good simple food with no frills and authentic flavors. This is a place that would give Mediterranean restaurants in large major cities a run for their money!

Hope you have a hurricane-free weekend. Stay safe!

Friday, August 19, 2011

To Organic or Not to Organic?

When browsing the grocery store, I often think to myself, "Should I pay for an organic version of this or not?" But often, I don't remember all the articles that I've read about what is worth or not worth buying organic regarding produce. Then I found this recently on the Lifehacker blog and just had to print a copy in color and post it on my fridge. 

It's just too cute! 


Image from My Paper Crane

Maybe now that I have a mental image of the fruits and veggies, I'll actually remember which of the dirty dozen are actually very dirty!

Have a great weekend and enjoy the tail end of summer! Hello Fall.

Monday, August 15, 2011

Soba Noodles in Japanese Broth

Have you ever looked at the NYTimes Recipes for Health pages and thought, "I should probably eat something like that for dinner." I had one of those moments a few months ago and had the foresight to jot down this recipe before I lost it in my long list of things I want to make. This is likely going to be the simplest dinner that I will make this week. It was so simple I even had time to make Momofuku Shrimp Spring Rolls, which were also a hit.


Soba Noodles in Broth with Sweet Potato, Cabbage, and Oyster Mushrooms
Serves four as a main dish, six as a starter.

Ingredients
6 cups kombu dashi, chicken stock or vegetable stock 
6 ounces Japanese soba noodles, cooked and tossed with 1 tablespoon sesame oil
1 large or 2 small sweet potatoes (about 3/4 pound), peeled and sliced about 1/4 inch thick (cut in half lengthwise first if fat)
2 cups shredded cabbage
10-12 oyster mushrooms, rinsed
2 tablespoons minced chives
Salt to taste

Directions
1. Bring the stock to a simmer. Taste and adjust seasoning, adding salt if desired. Add the sweet potatoes and cabbage, and simmer 15 minutes until the vegetables are tender.

2. If the noodles have been refrigerated, warm them by placing them in a strainer and dipping the strainer into the simmering broth. Then distribute the noodles among four to six soup bowls. Add the spinach to the stock. Cover, and turn off the heat. Leave for three minutes. Ladle the soup into the bowls, taking care to distribute the vegetables evenly. Sprinkle the chives over each serving, and serve.


For something that is healthy, it was quite delicious and easy to make. I will definitely be making this one again during the cold winter months when only a bowl of hot soup can warm you up. 

Have a great Monday everyone! 

Friday, August 12, 2011

#durhamtweetup 2011

Sometimes blogging can feel like an isolating activity. And while cooking and writing is extremely therapeutic for me, it can be fun to meet up with like-minded folk and just talk media and food. I had heard about "tweetups" before, but never attended any for fear that I would be an odd duck in the midst of writers, photographers, and other creative minds. However, yesterday evening was the durhamtweetup hosted by @durhamfoodie and @designkompany and I'm so glad I went! It was fun to put faces to twitter handles and actually meet the movers and shakers of the Durham media and food scene. 


Of course where there are foodies, there are food trucks! Welcome to the scene, @ChirbaChirba, Durham's first dumpling truck. Didn't have a chance to try them because of the long line, but will definitely be tracking them down in the future. 


Also caught sighting of @WillandPops, which makes locally-sourced food. Had their Mango Lemonade, which hit the spot on a hot evening. Also in attendance and not shown, but previously featured: @piepushers and @parlourdurham


I'd been looking for @KoKyuBBQ for a long time and finally had a chance to try them. 


Thai-Ko. 


Short Rib Slider. 


Duckfat Tots. 


The Thai-Ko had a super flavorful relish/salsa that was delicious with hints of sweetness and spice. The Short Rib Slider had marinated daikon and cucumbers, yum yum. The duck fat tots were what you would expect - fried tots, but with a creamy dip (that might contain duck fat?). I can see why KoKyu has received a following. Layers of flavor and combinations of salt, sweet, and spice. Keep in mind that food truck food is not always cheap - definitely a quality over quantity thing here. 

Overall, durhamtweetup was a laid back and inviting event to meet people who appreciate a vibrant food, media, and creative scene in Durham. Looking forward to seeing how this evolves in the next few years. 

A followup thought to the success of this tweetup. Anyone interested in a similar gathering for young (and old) women entrepreneurs and self-employed folk in Durham? Imagine the wisdom and synergy that could be generated at an event like that! Find me on twitter if interested: @spoonraider

Have a great weekend everyone! 

Wednesday, August 10, 2011

Homemade Potato Gnocchi

A lonely sack of 5 lb potatoes was sitting on our kitchen bench. Since we rarely eat potatoes, I don't know what possessed us to purchase a 5 lb sack. I had some great suggestions to make gratin dauphinois or 5 lbs of french fries. But I decided to overcome my fears of making potato gnocchi and give it one more try. I tried making gnocchi once in college and it was a complete fail. The dough was a ball of sticky mush that never ended up in our mouths. 

This recipe is from Smitten Kitchen. I think I mostly chose it because I could identify with her failed attempts and the pictures made me drool. 

Ingredients
2 pounds Russet potatoes
1 1/2 cups flour

1 teaspoon salt

1 large egg, lightly beaten

Directions
1. Preheat your oven to 400°F. Prick the potatoes all over with a fork, and bake them on a baking sheet for 45 minutes to one hour, or until they are fork-tender. For best results, turn the potatoes over halfway through the baking time. Let the potatoes cool slightly.

2. Peel the potatoes, and then pass them through a potato ricer, food mill or grate them over the large holes of a box grater into a large bowl. Add the lightly beaten egg and the salt to the potatoes and mix well with a wooden spoon.


3. Add the flour to the potatoes a little at a time, using only as much as you need so that the dough will not stick to your hands. When the flour has been incorporated, bring the dough together with your fingertips.

4. Dump the dough and any remaining floury bits onto a slightly floured surface. Knead the dough as you would bread dough. Press down and away with the heel of your hand, fold the dough over, make a quarter turn, and repeat the process. Knead for about three or four minutes.

5. Form the dough into a ball and then divide it into 6 smaller balls. On a lightly floured surface, roll out one of the six pieces using your fingertips into a long rope about 3/4 inch thick. Cut the dough into 1 inch pieces.


6. You can cook the gnocchi as it is now, but traditional gnocchi has ridges. To create the ridges, press each piece of dough against the tines of a fork. With your finger, gently roll the pressed dough back off the fork. This takes a little practice. If you find the dough sticking to the fork, dip the fork in flour before you press the dough against it.

7. Place the gnocchi in a single layer on a lightly floured or parchment-lined dish. If you’d like to freeze them for later use, do so on this tray and once they are frozen, drop them into a freezer bag. This ensures that you won’t have one enormous gnocchi mass when you are ready to cook them.

8. To cook the gnocchi, place them into a pot of boiling and well-salted water. After a few minutes the gnocchi will float to the top. Continue to cook for one minute then remove and set aside.


If your dough ball comes an unruly, sticky mess, do not give up! Keep adding flour slowly and eventually it will stop sticking. I thought about throwing the whole batch away when large stabs of dough kept sticking to my entire palm, but I just kept at it. 

The result is light, chewy gnocchi that is quite fabulous lightly pan-seared after a quick boil. Since these take considerable effort (especially in the beginning), I would suggest making a bunch and freezing for rainy days. 

Gnocchi-making aversion? Cured!